This article explains how to create a new customer for use within new Portal.
Customer records are created initially in classic Portal.
Note: Due to the current system and database configuration, new customers must be created initially in classic Portal. Once created, the customer will automatically become available for selection within new Portal.
After a customer has been created, it can be used within new Portal for assessment, action, and reporting activities.
Who can use this Feature?
Create Customer (classic Portal):
- Admin
View Customer (new Portal. Not only grants):
- Standard + Estate Manager
- Admin
- Tech Admin
Prerequisites
Before creating a customer, ensure you:
- Have access to classic Portal.
- Have permission to manage customers.
- Have the information required to create the new customer record.
Access Customer Management
- Log in to classic Portal.
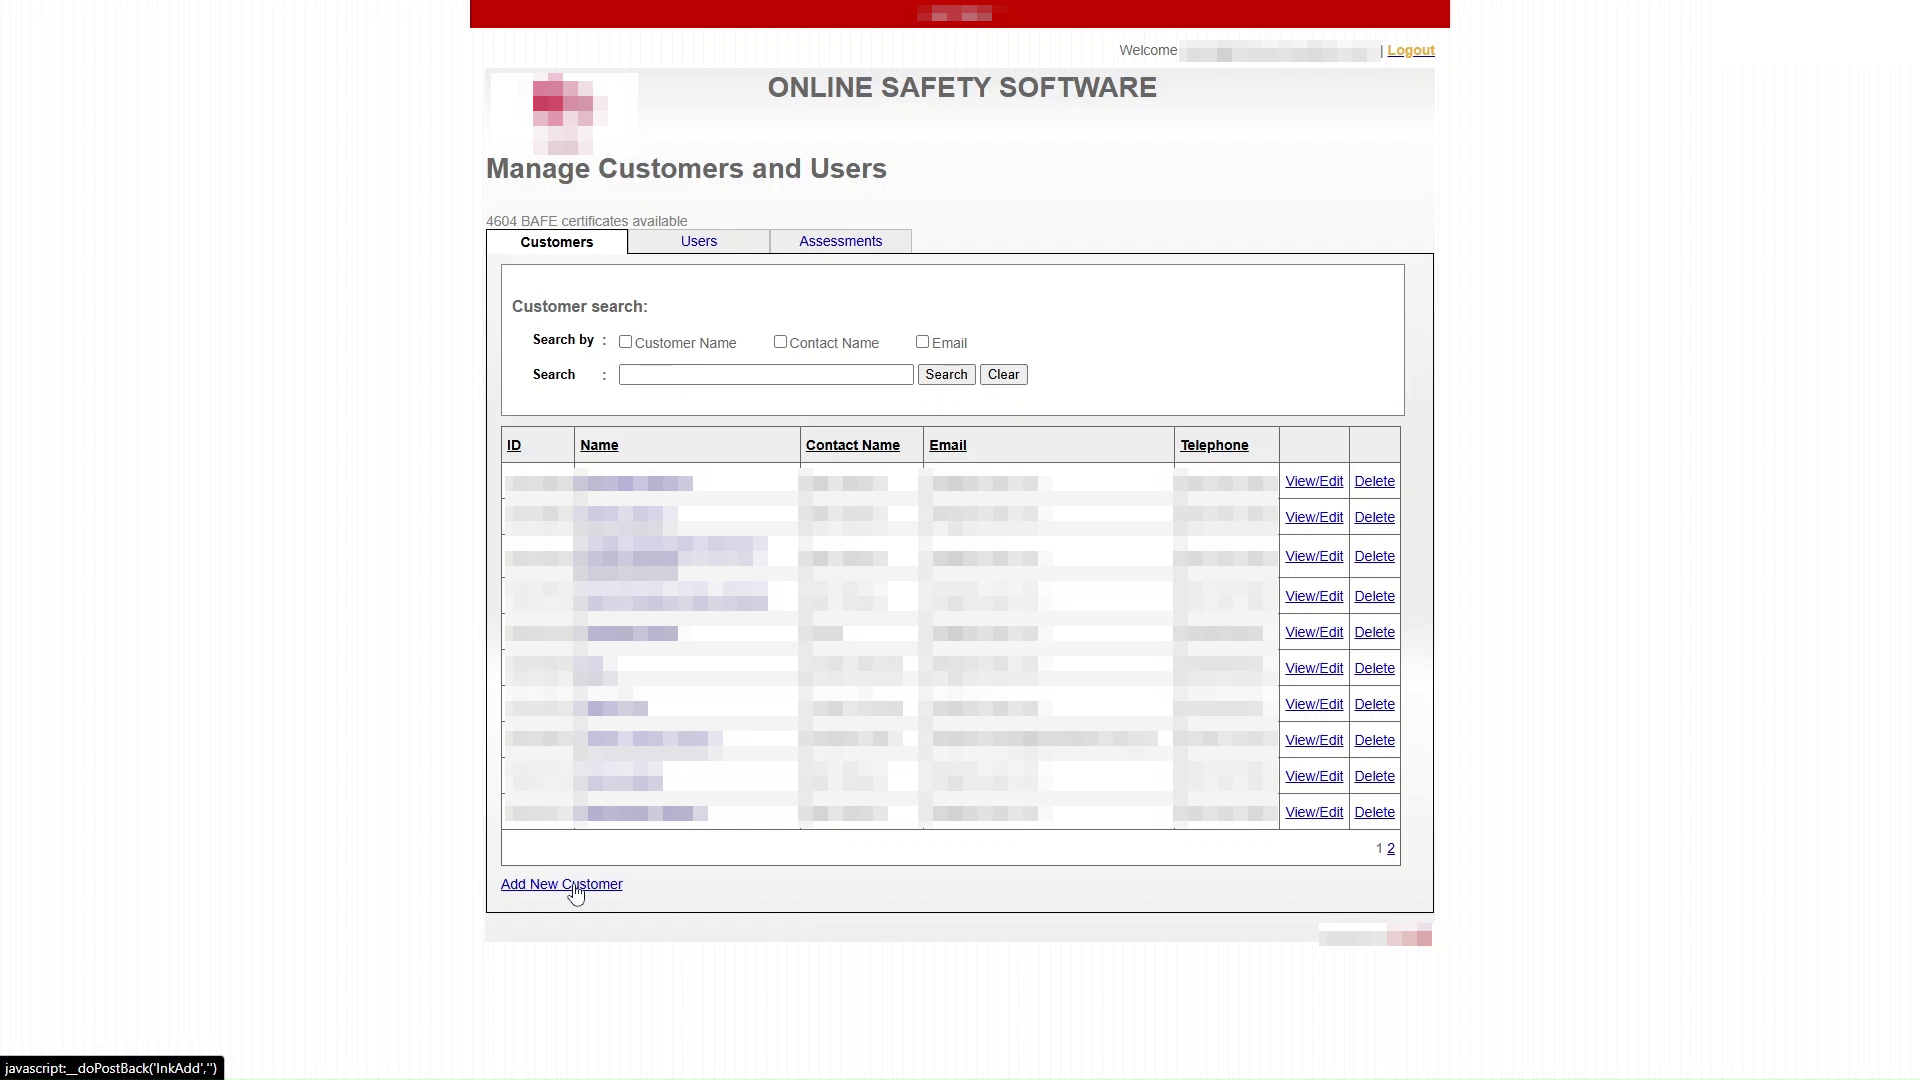
2. From the landing page, select Add New Customer in the bottom left of the screen.
Create a New Customer
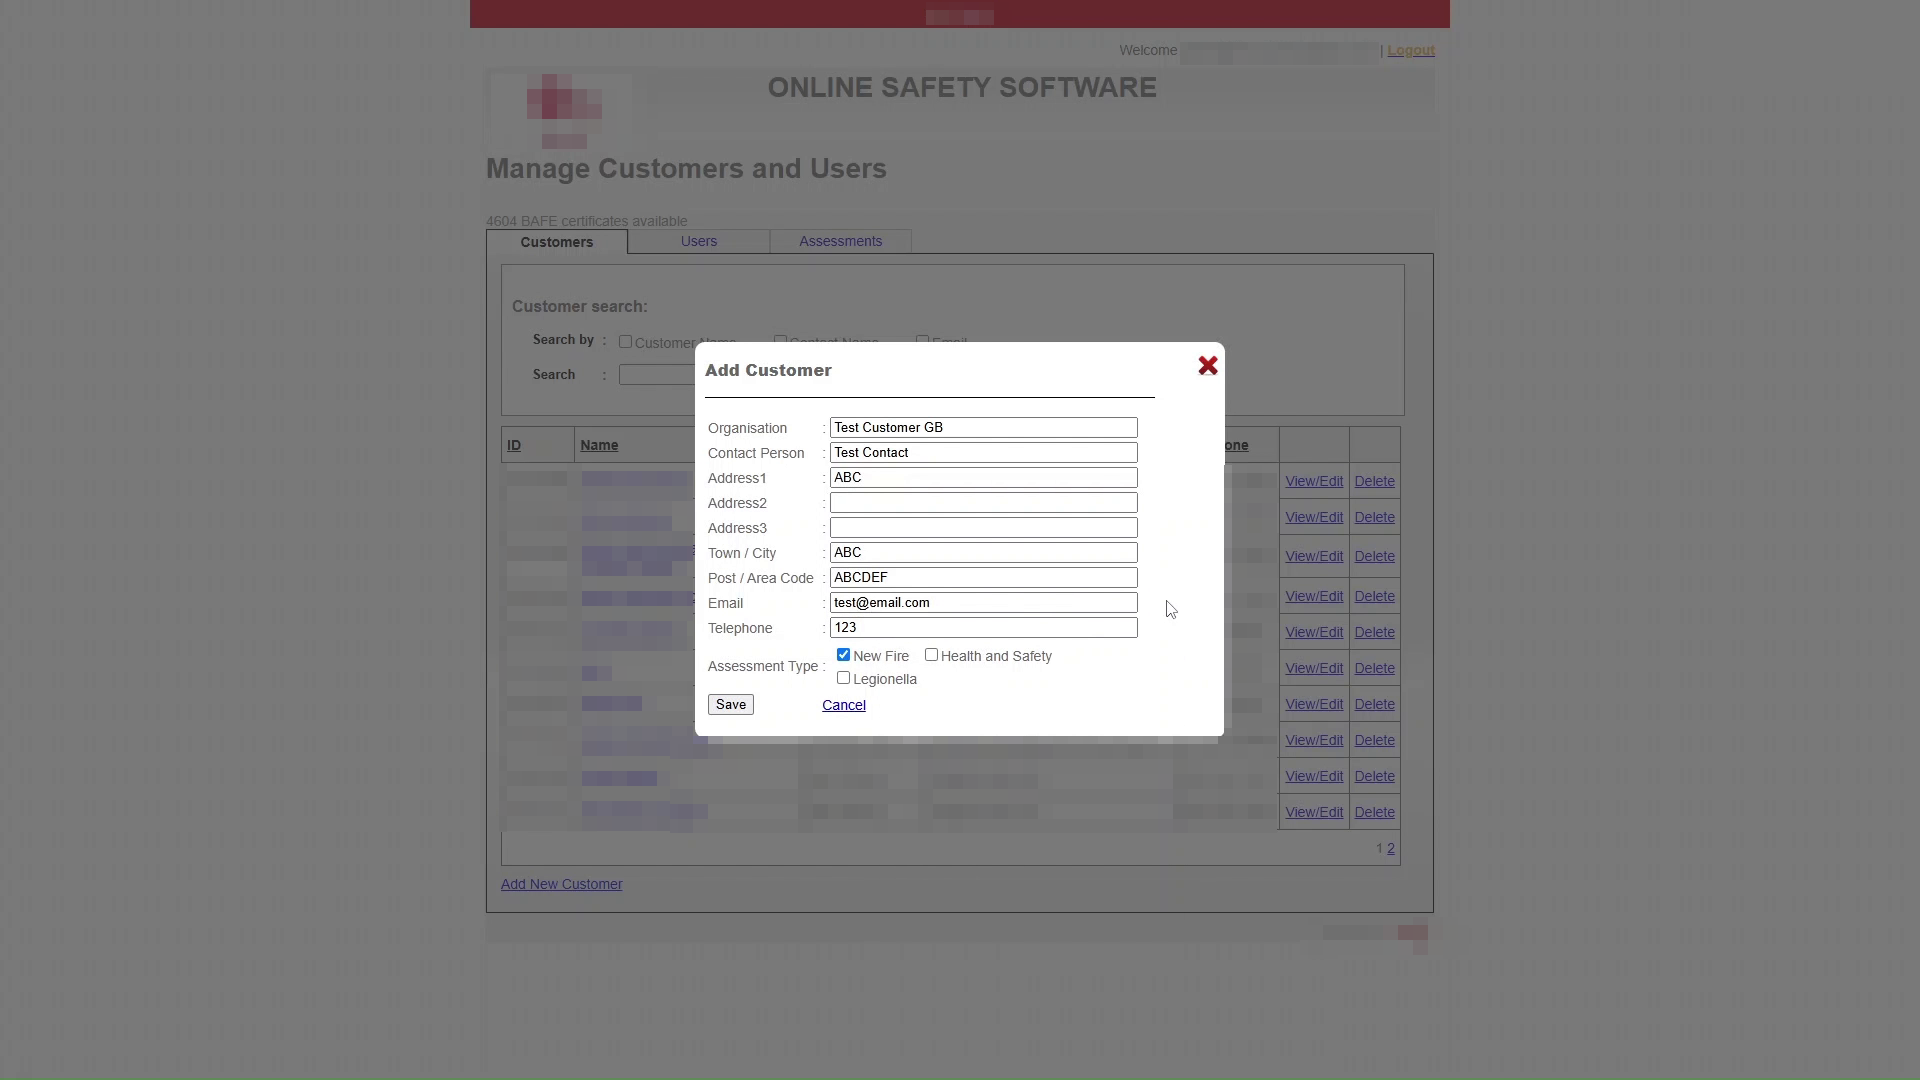
1. The Add Customer form will open.
2. Enter the customer's details in the available fields.
Configure Assessment Types
Assessment types determine which types of assessments can be carried out for the customer.
- Locate the assessment type section.
- Select the assessment types required for the customer.
- Additional assessment options may be available depending on your organisation's configuration.
Save the Customer
- Review the information entered.
- Select Save to create the customer record.
- A confirmation message will be displayed once the customer has been created successfully.
Verify the Customer Record in Classic Portal
After saving, confirm that the customer has been added successfully.
- Return to the customer list.
- Search for or locate the new customer.
Confirm Availability in new Portal
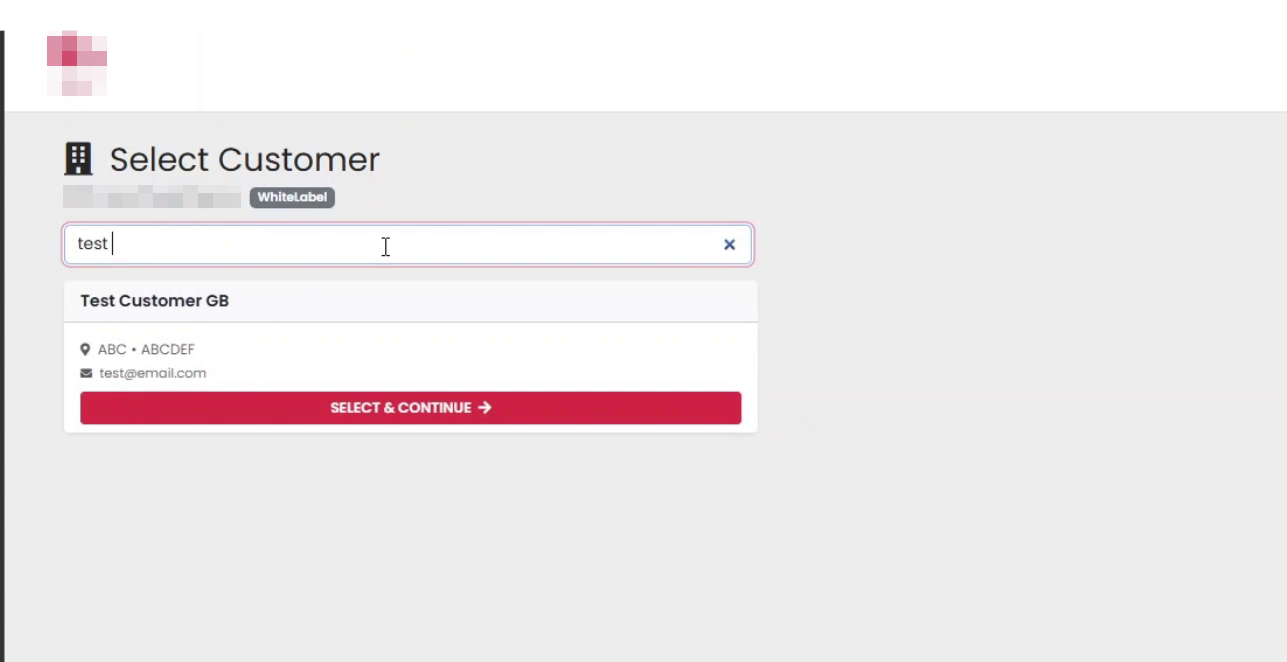
Once the customer has been created in classic Portal, it will become available in new Portal.
- Open new Portal.
2. Navigate to the landing page, where customers can be selected.
3. Refresh the customer selection list.
4. Search for the new customer to confirm that the newly created customer is available for selection.
Result
The customer has now been created in classic Portal and is available for use within new Portal. The customer can now be associated with sites, buildings, assessments, actions, and reporting activities.
Was this article helpful?
That’s Great!
Thank you for your feedback
Sorry! We couldn't be helpful
Thank you for your feedback
Feedback sent
We appreciate your effort and will try to fix the article