Overview
The new Portal allows administrators to create new users and grant access to a customer's estate. Users can be assigned different permission levels depending on the access they require.
Users can either:
- Link an existing WhiteLabel user to the customer
- Create a brand-new user account
Once created, a temporary password and setup link can be generated to allow the user to sign in for the first time.
Who can use this Feature?
- Standard + Estate Manager
- Admin
- Tech Admin
Prerequisites
Before adding a user, ensure that:
- You have access to the customer account.
- You have Administrator permissions within the customer estate.
- You know the user's email address and display name.
Step 1: Open Users & Building Access
From the Estate menu, select Users & Building Access.
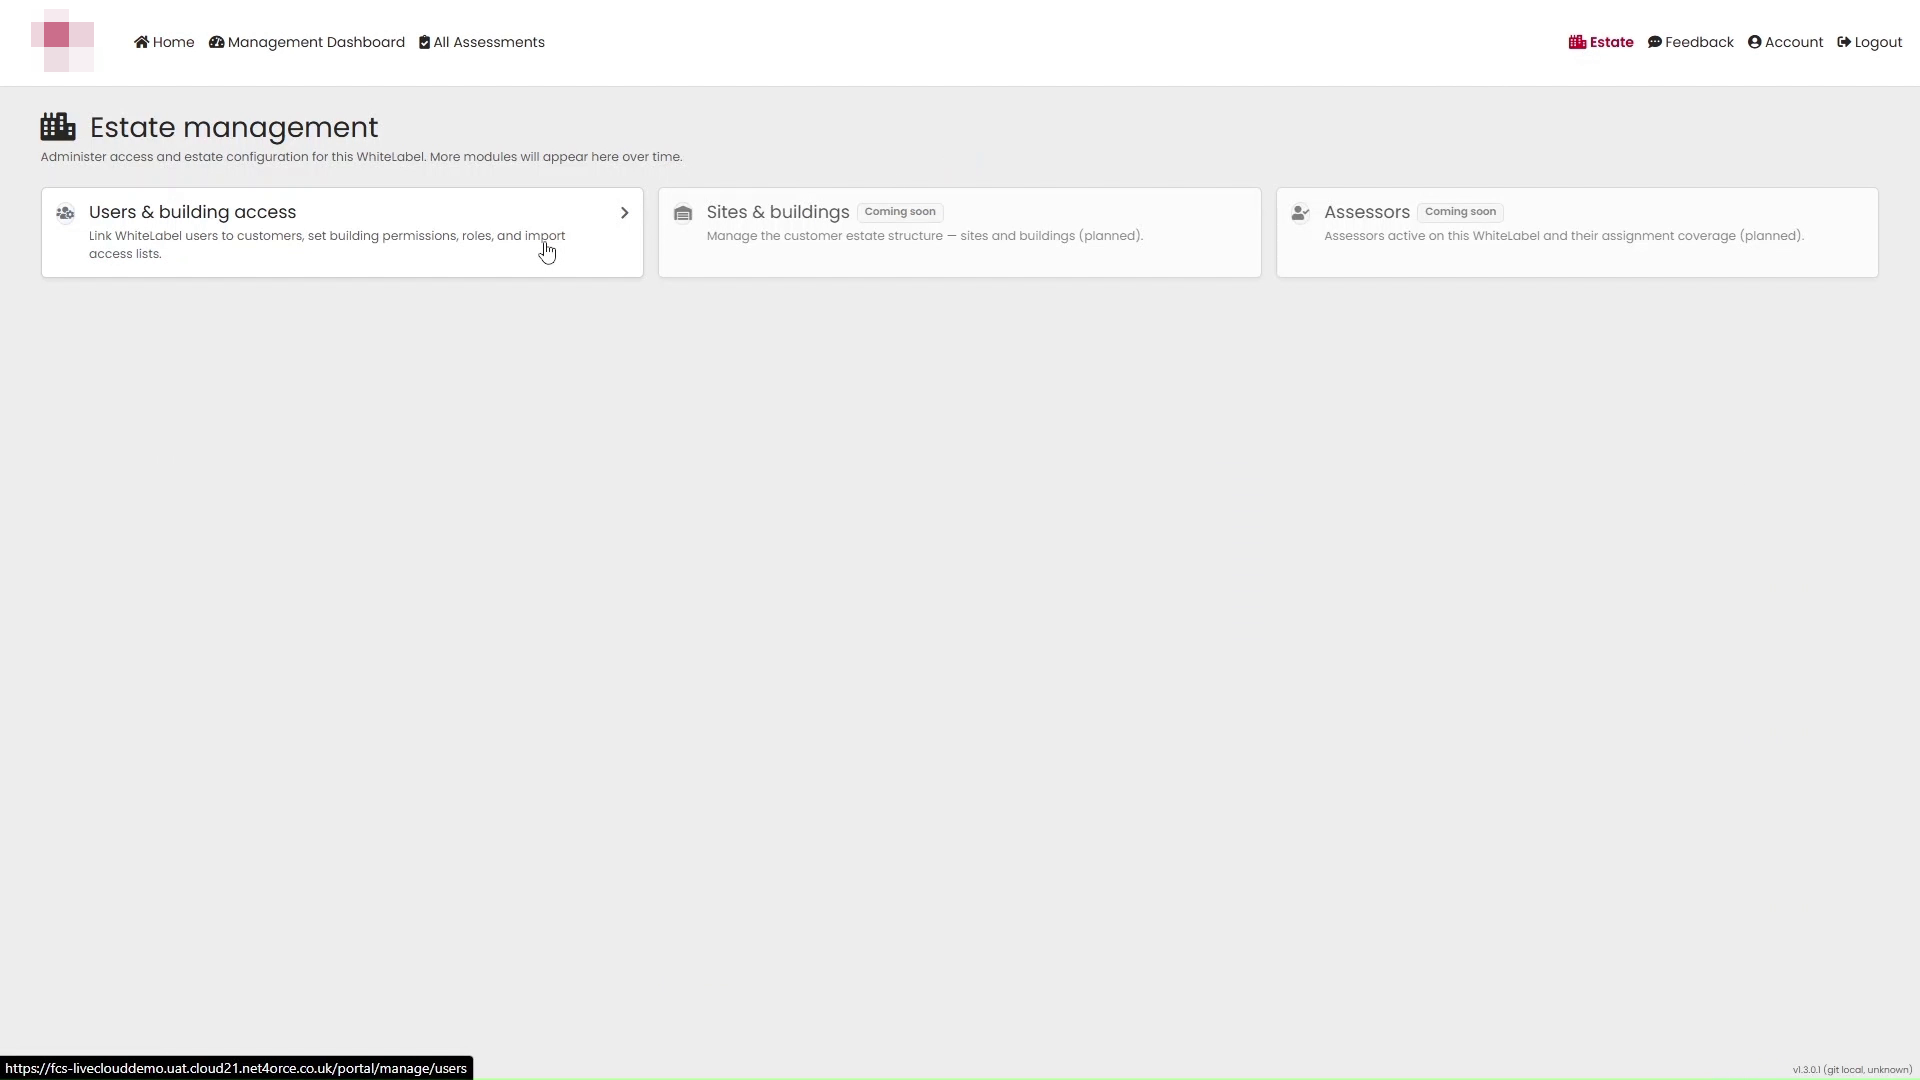
The Manage Users page will open.
Choose a Customer.
Step 2: Start Adding a New User
Select Add User.
You will be presented with two options:
Link Existing WhiteLabel User
Use this option if the user already has a WhiteLabel account and simply needs access to this customer.
Create New User
Use this option to create a brand-new account for someone who has not previously used the platform.
For a new user, select Add User.
Step 3: Enter User Details
Complete the required information:
- Email Address
- Display Name
Step 4: Choose a User Role
Select the appropriate role for the user.
Roles are covered in Role Based Access Model.
Step 5: Create the User
After completing the required details and selecting a role, choose Create Local User.
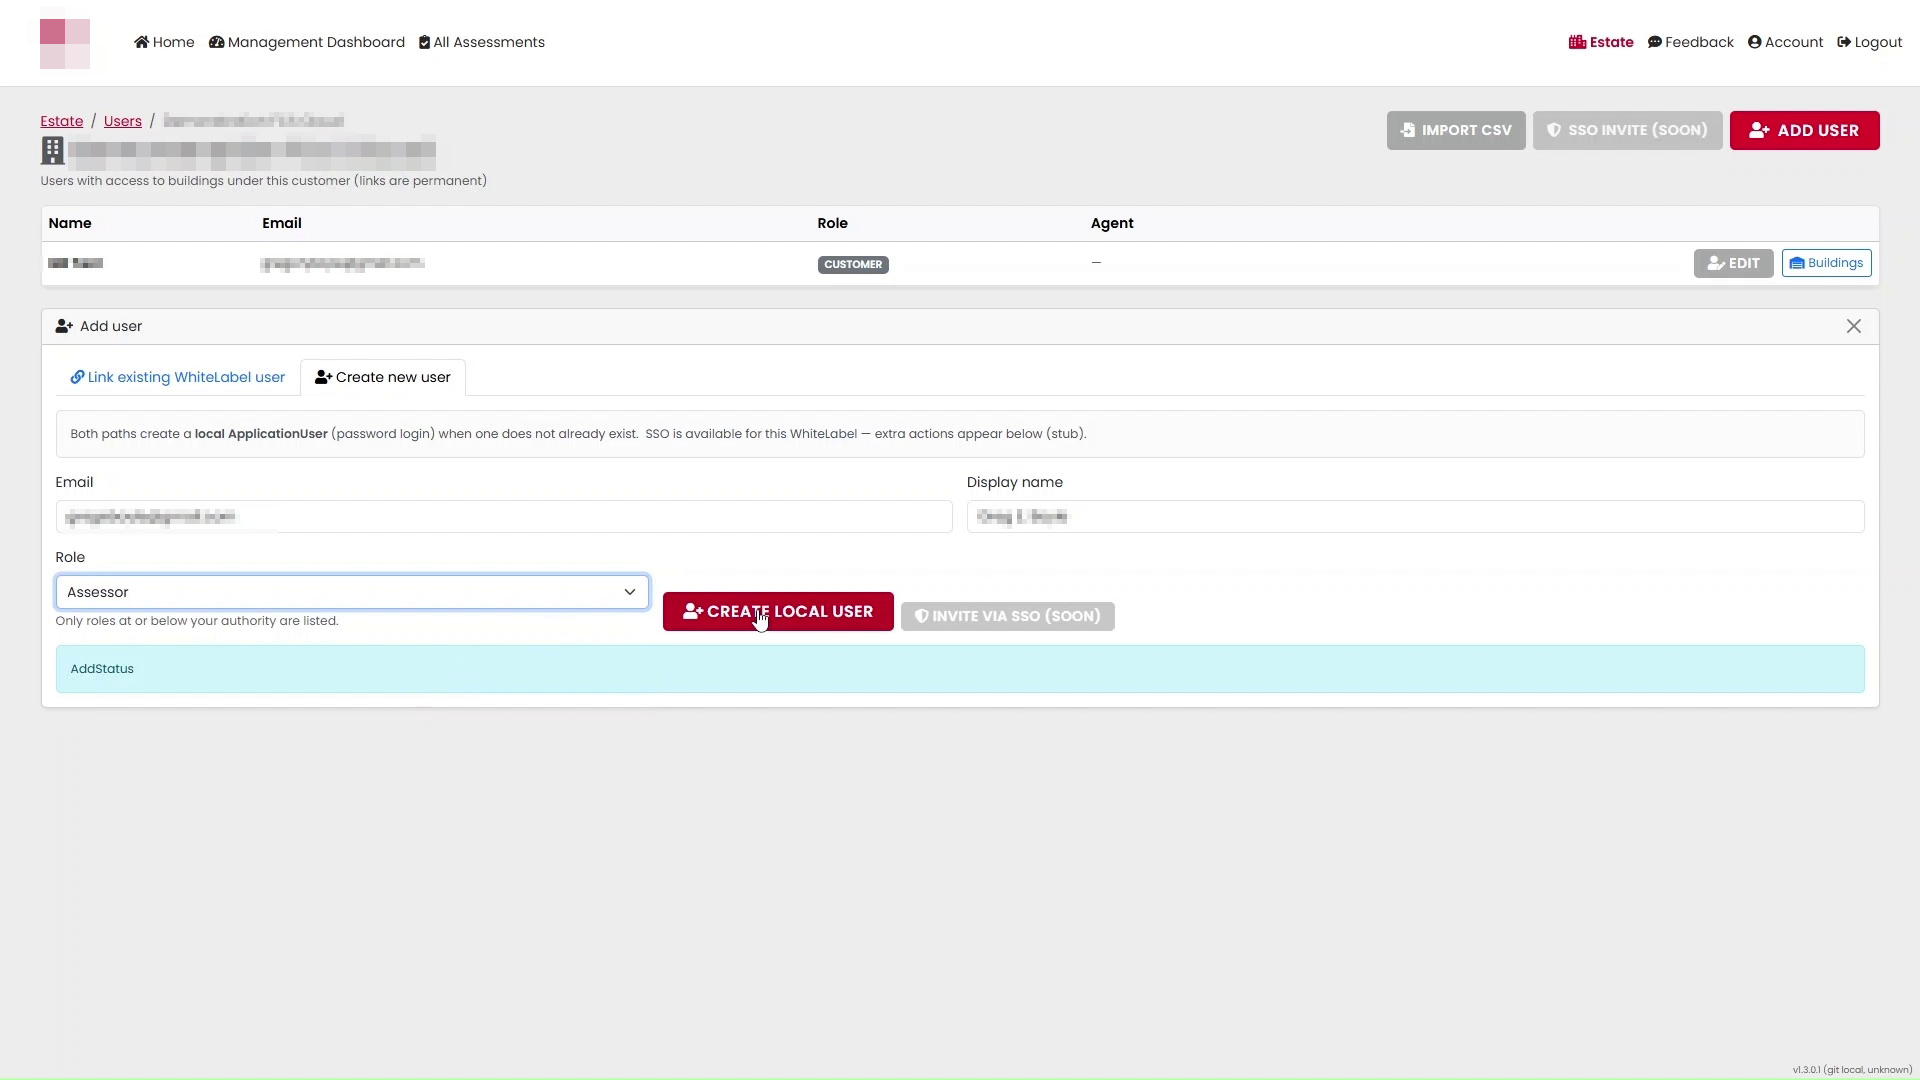
The new user profile will be created and displayed.
Step 6: Generate a Temporary Password
Before the user can log in, a temporary password must be generated.
Select Generate Temporary Password.
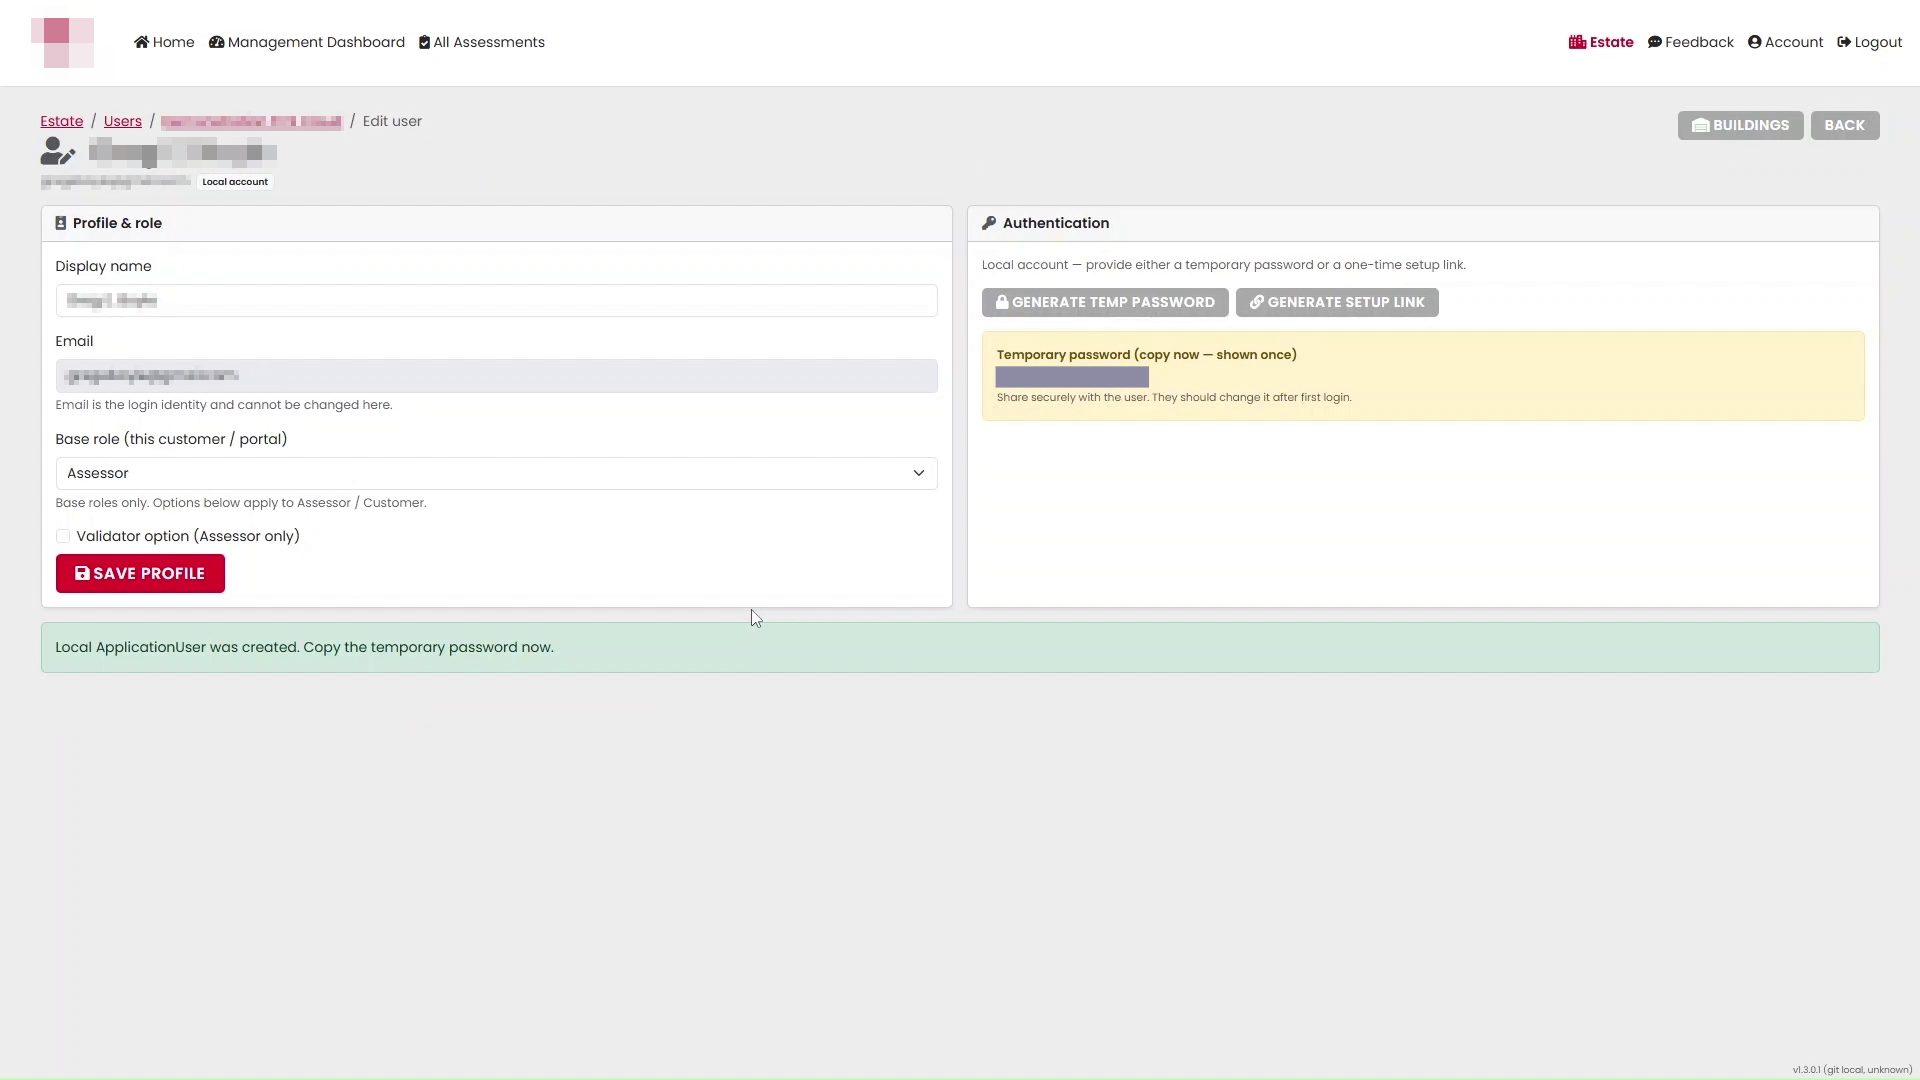
A temporary password will be created and displayed.
Select Copy to copy the password to your clipboard. Paste it to a Notepad document.
Important: Store the temporary password securely and send it to the user using an appropriate communication method.
Step 7: Generate a Setup Link
To help the user access the Portal and set up their account, generate a setup link.
Select Generate Setup Link.
Copy the generated setup link and provide it to the user along with their temporary password.
Step 8: User First Login
The user can access the Portal using the setup link or by navigating to the login page.
The login screen is displayed.
The user enters:
- Email address
- Temporary password
After signing in successfully, the user is taken to the customer selection page and can begin using the Portal.
Additional Notes
- A user can only access customers and buildings that have been assigned to them.
- If a user already exists within WhiteLabel, use the Link Existing WhiteLabel User option instead of creating a duplicate account.
- Temporary passwords should be shared securely and changed in accordance with your organisation's security policies.
- Administrator users can return to Estate Management → Users & Building Access at any time to review or amend user access.
Was this article helpful?
That’s Great!
Thank you for your feedback
Sorry! We couldn't be helpful
Thank you for your feedback
Feedback sent
We appreciate your effort and will try to fix the article