Overview
The Batch Add Users feature allows Estate Administrators to create multiple user accounts at once by uploading a CSV file.
This is useful when onboarding several users to an estate, rather than creating each account individually.
Users can be assigned roles during import and can be granted access to specific buildings before invitation emails are sent.
Who can use this Feature?
- Standard + Estate Manager
- Admin
- Tech Admin
Open the User Management Area
1. Hit the Estate link in the top right.- Choose the Customer
- On the Manage Users page, select Import CSV.
Select the Import Format
- Select Format: Email + Role CSV
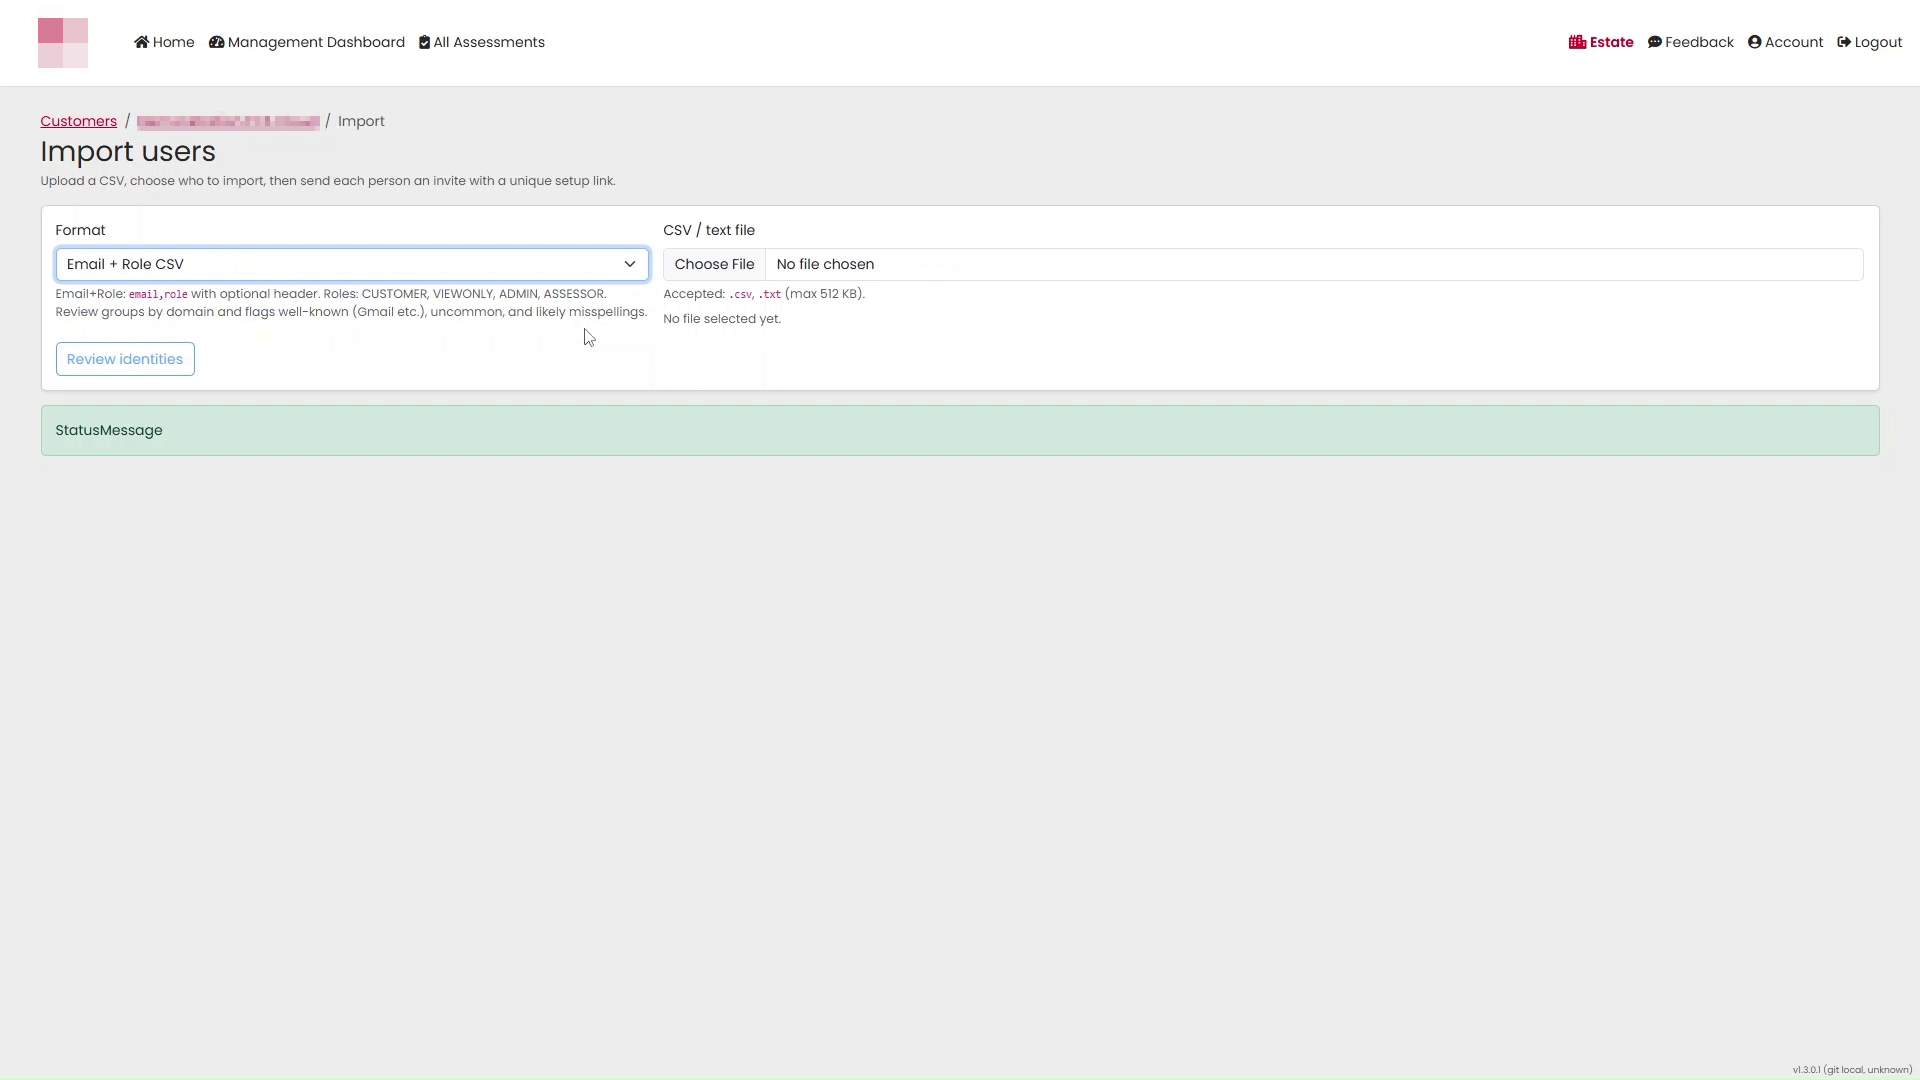
Prepare the CSV File
Prepare the CSV file in Microsoft Excel and enter the details for each user.
The template contains two columns:
| Column | Description |
|---|---|
| User email address | |
| role | User role |
Add one user per row.
Example:
| role | |
|---|---|
| user1@example.com | CUSTOMER |
| user2@example.com | CUSTOMER |
Available Roles
Typical roles include:
- CUSTOMER
- TECHADMIN
- VALIDATOR
- ASSESSOR
Use the role required for each user.
Save the CSV File
- Select File then Save As.
- Choose a save location.
- In the Save as type field, select:
CSV UTF-8 (Comma delimited) (*.csv)
- Save the file.
- If Excel displays a warning message, select Continue to complete the save.
Upload the CSV File
- Return to the Import Users page.
- Select Choose File.
- Browse to the CSV file and select it.
- Select Review Identities.
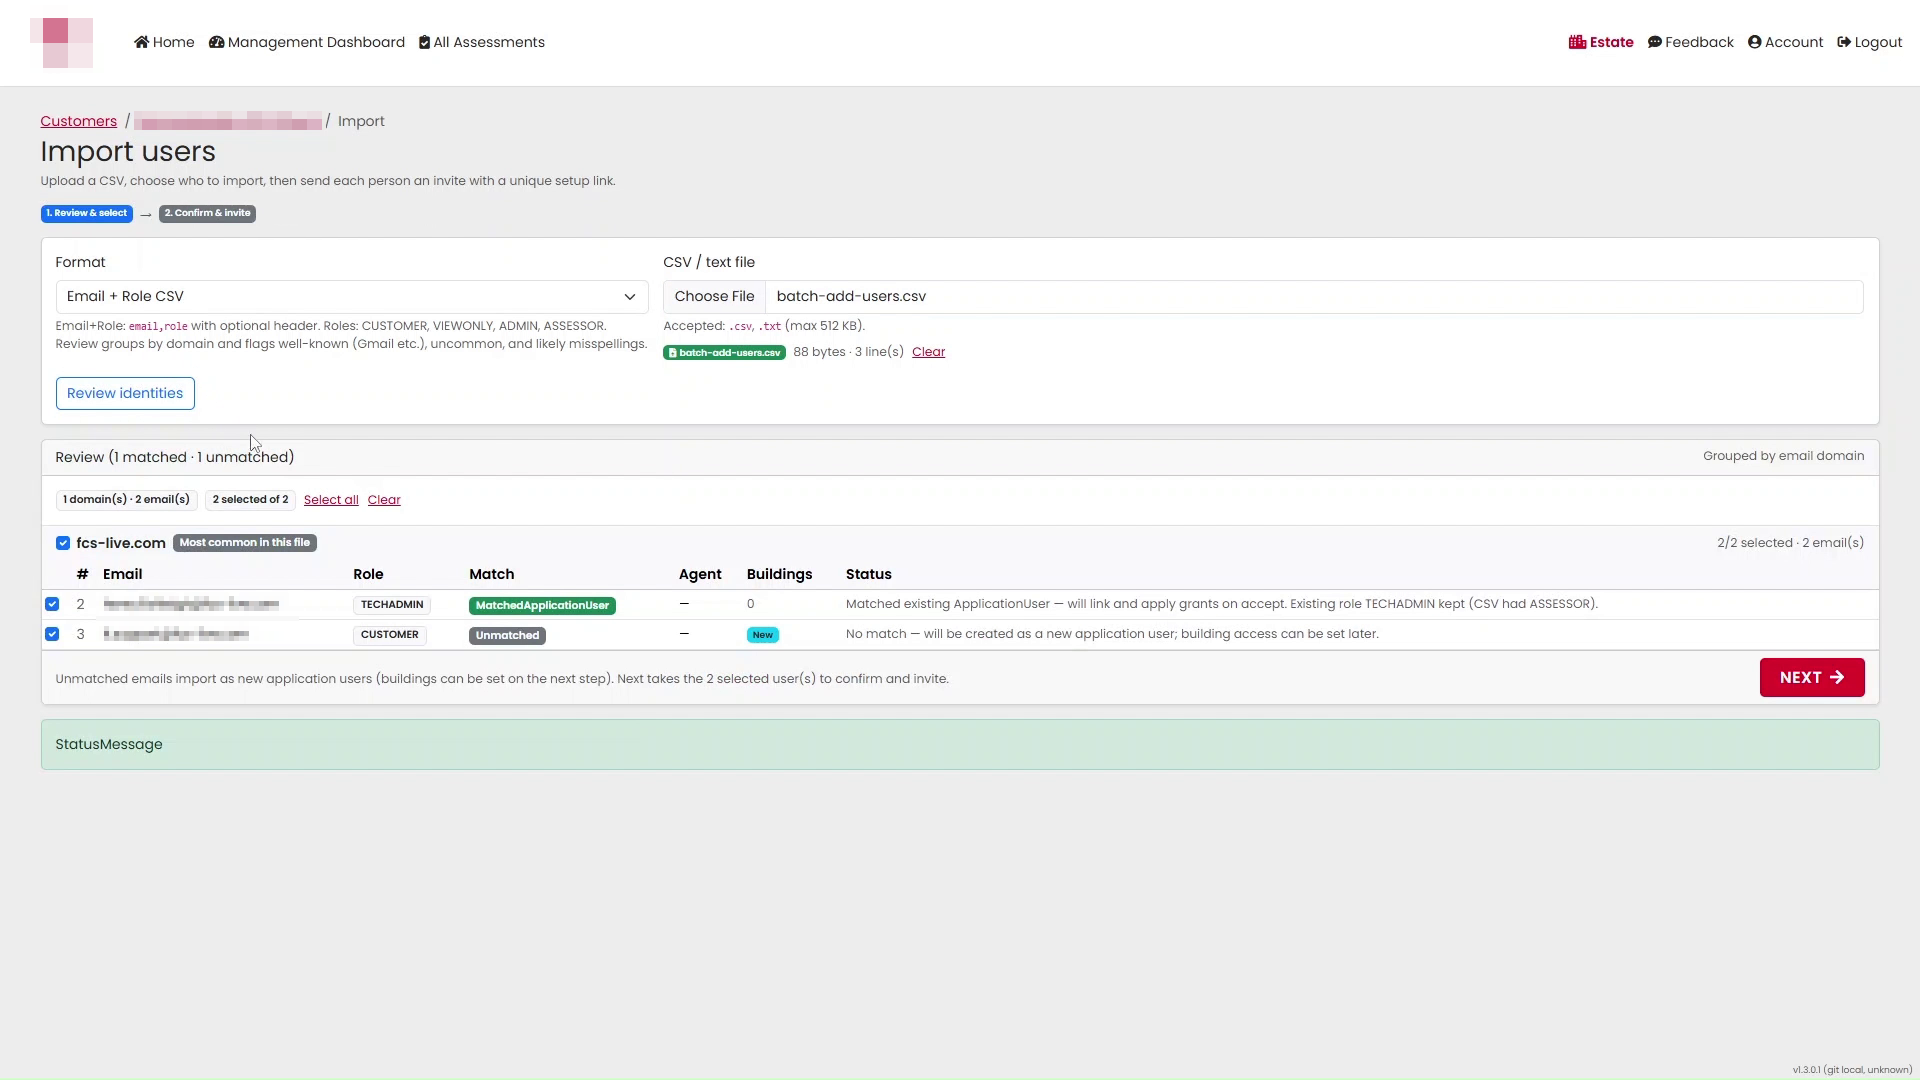
Review Imported Users
After the file is uploaded, the system validates each user.
The review screen displays:
- User email address
- Assigned role
- Account status
- Any validation issues
Account Statuses
You may see different account statuses:
| Status | Meaning |
|---|---|
| Existing portal user | The user already has a portal account |
| New application user | A new account will be created |
If required, remove incorrect entries before continuing.
Hit Next.
Configure Access for New Users
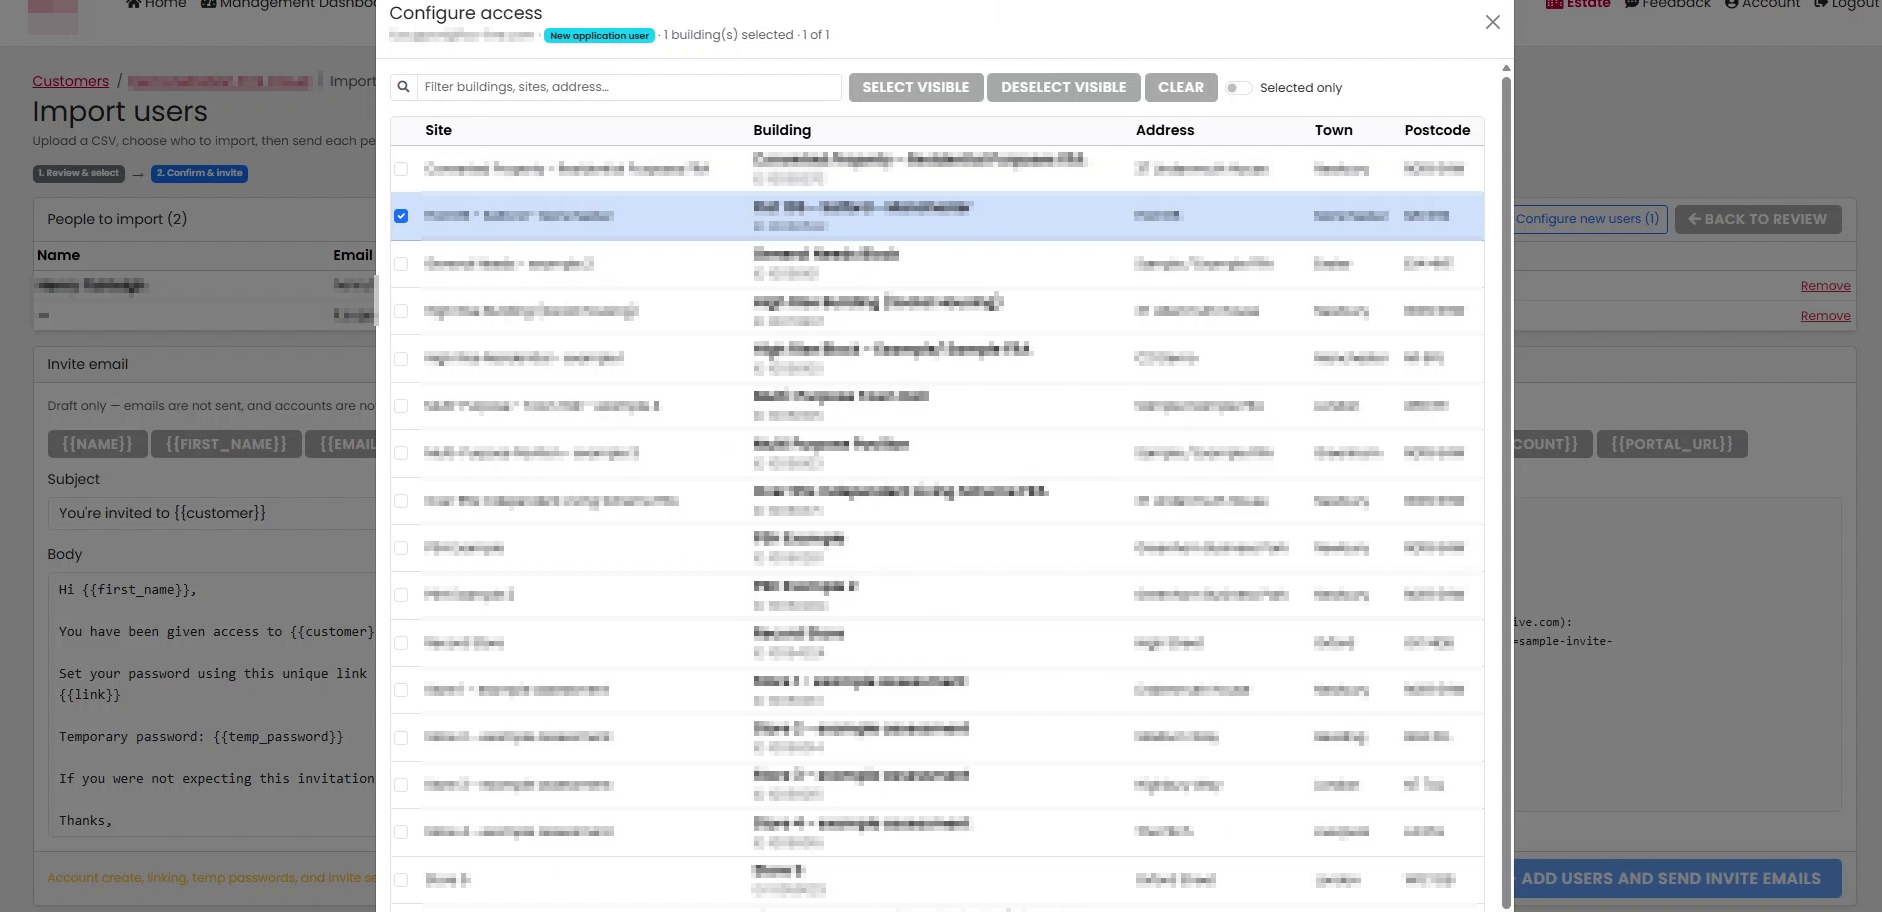
Users with new accounts can be granted access to specific buildings before invitations are sent.
- Select Configure New Users.
- The access configuration window opens.
- Use the search box to find buildings if required.
- Select the buildings the user should be able to access.
- Select Save Access.
- The assigned building count is displayed against the user record.
To amend assigned buildings, select the building link shown in the Access column.
Review Invitation Email
Before creating accounts, review the invitation email that will be sent to users.
The page displays:
- Email subject
- Email body
- Available merge fields
- Email preview
Merge fields are automatically replaced with user-specific details when the invitation email is sent.
Create Users and Send Invitations
Once the review is complete:
- Select Next - Add Users and Send Invite Emails.
- The Portal:
- Creates any required user accounts
- Applies configured building access
- Sends invitation emails to new users
The invited users can then follow their email instructions to activate their accounts and access the estate.
Summary
Using Batch Add Users allows administrators to:
- Create multiple users in a single process
- Assign roles automatically
- Configure building access before invitations are sent
- Send onboarding emails to multiple users at once
This provides a faster and more efficient way to manage user access across large estates.
Was this article helpful?
That’s Great!
Thank you for your feedback
Sorry! We couldn't be helpful
Thank you for your feedback
Feedback sent
We appreciate your effort and will try to fix the article