Overview
Due to the current database setup, Sites and Buildings must be created in classic Portal before they can be used within new Portal.
New Portal automatically synchronises customer, site and building information from classic Portal. Once a Site and Building have been created in classic Portal, they will become available within new Portal and can be selected when creating assessments.
This guide explains how to:
- Create a new Site in classic Portal
- Create a new Building for that Site
- Verify the Site and Building are available within new Portal
Who can use this Feature?
Create Site & Building (classic Portal):
- Admin
View Site & Building (new Portal. Not only grants):
- Standard + Estate Manager
- Admin
- Tech Admin
Prerequisites
Before creating a Site or Building:
- The Customer must already exist in the system.
- You must have access to classic Portal.
Step 1: Open the Customer Record in classic Portal
Locate and open the customer that requires a new Site and Building.
Step 2: Create a New Site
On the Sites page, select Add New Site.
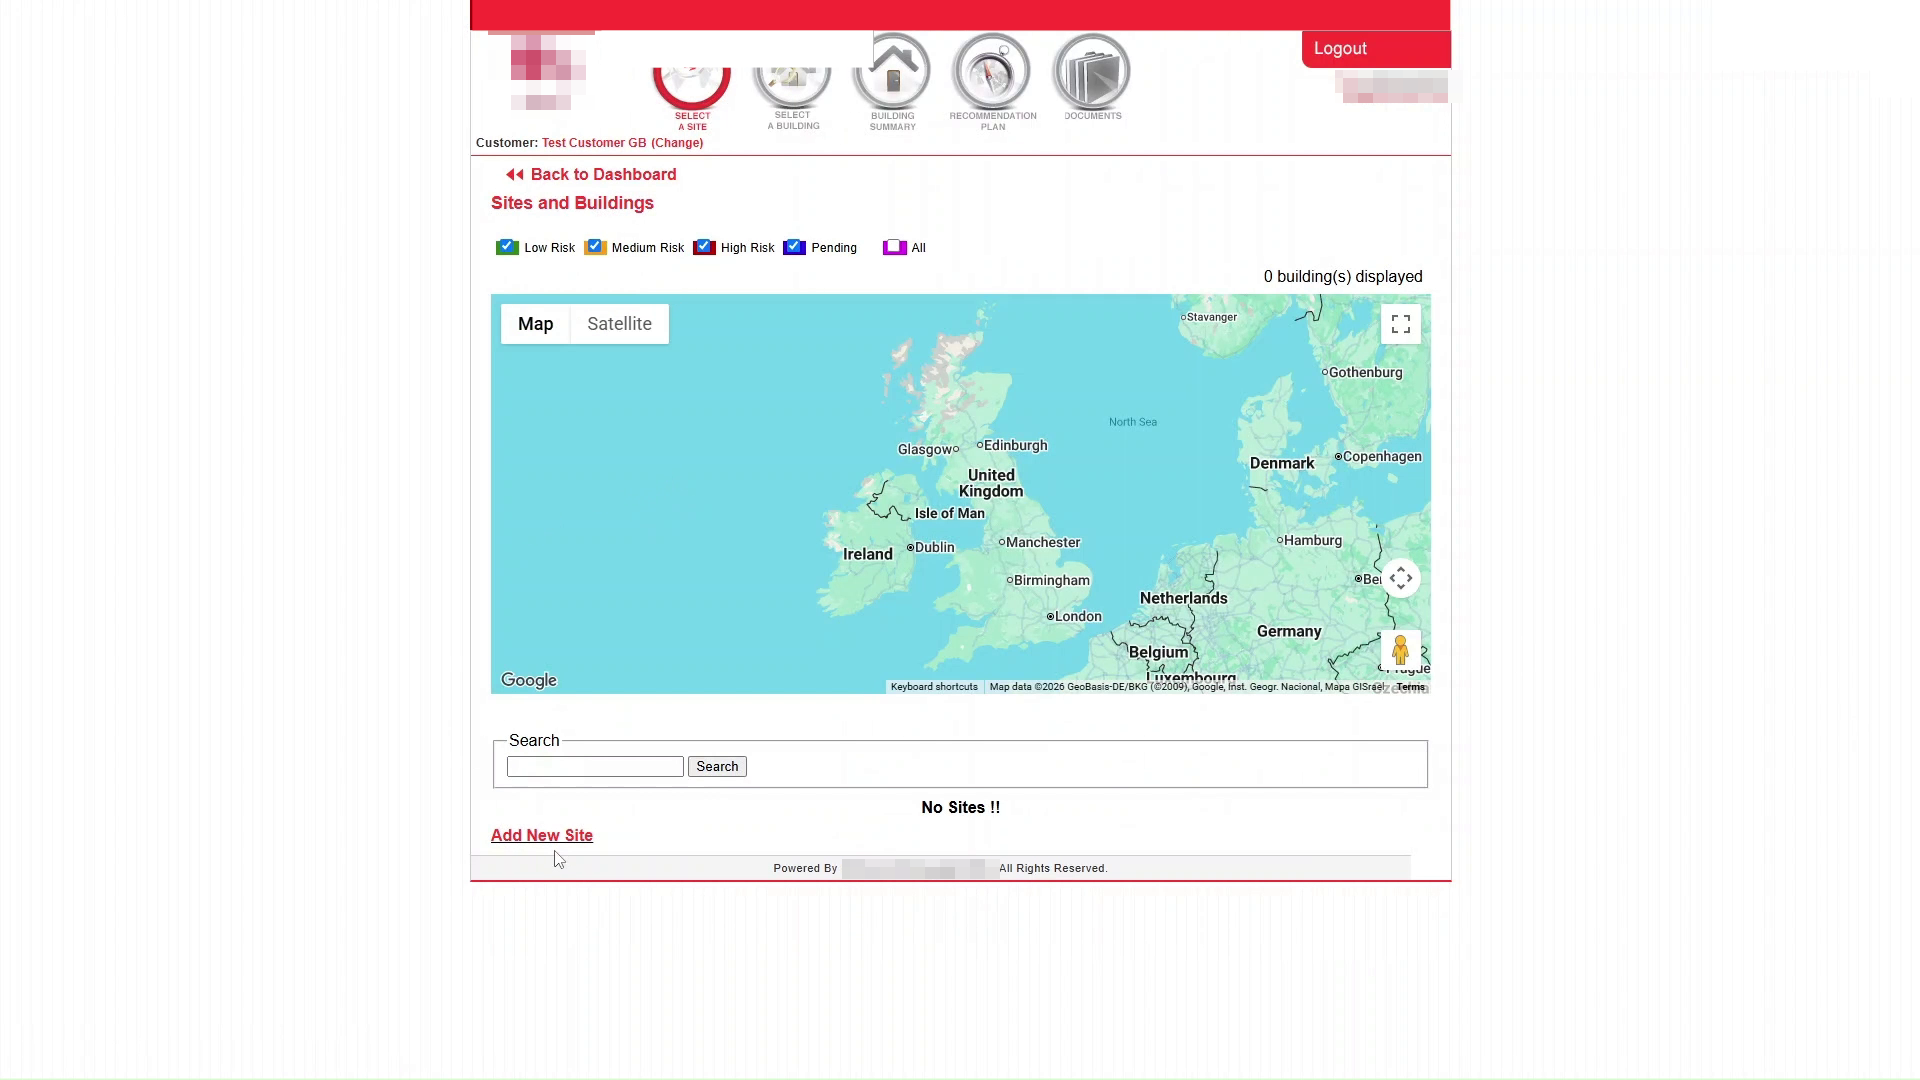
Complete the Site details as required.
Typical information includes:
- Site Name
- Location Name
- Address details
- Contact information
- Email address
- Telephone number
After entering the required information, select Save.
The new Site will now appear in the Sites list.
Step 3: Open Building Management
Locate the Site you have just created and select View Buildings.
The Buildings page will open for the selected Site.
Step 4: Create a New Building
Select Add New Building.
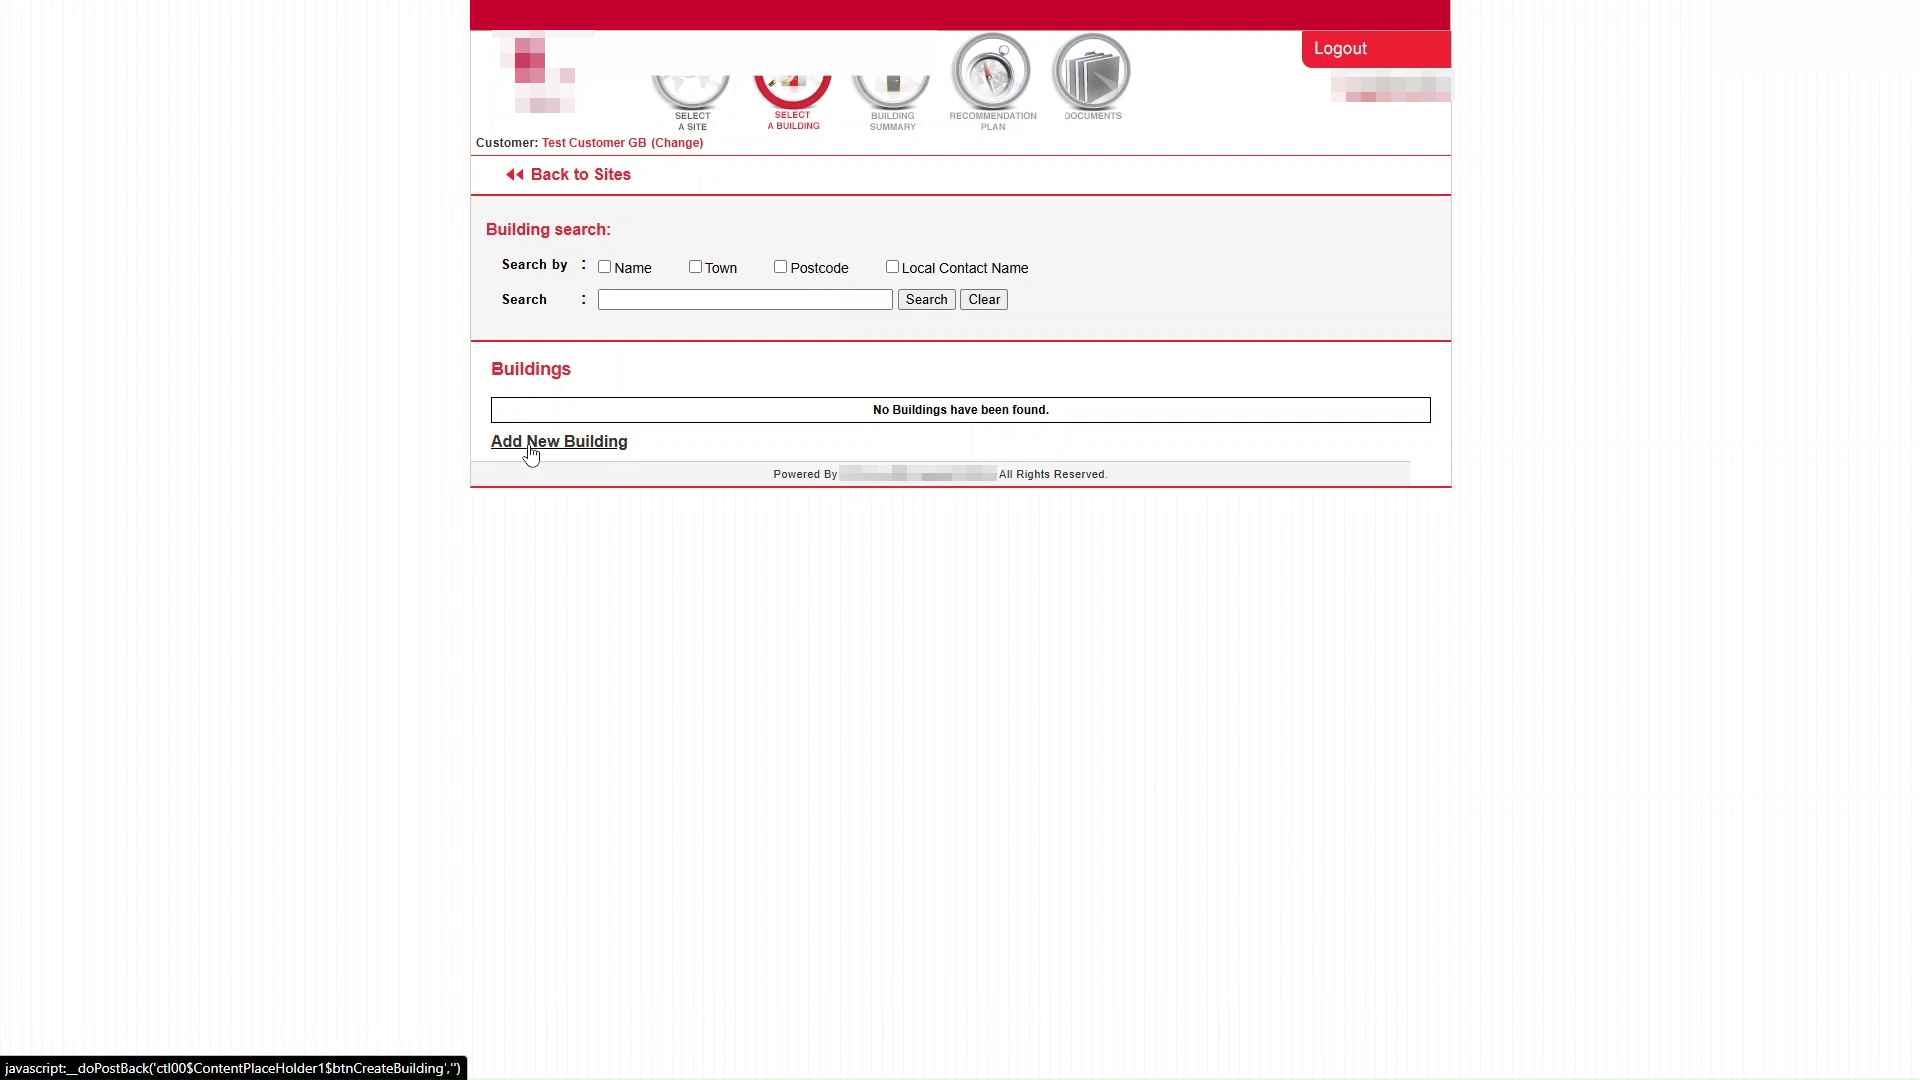
Enter the Building details.
Typical information includes:
- Building Name
- Address information
- Contact Name
- Contact Email
- Telephone Number
Review the information and select Save.
The Building will be added to the Buildings list for the Site.
Step 5: Verify the Site in new Portal
Return to the customer record within new Portal.
The Site should now be visible within the customer record.
Note: Depending on synchronisation timing, newly created Sites and Buildings may not appear immediately. If they are not visible, wait a short period and refresh the page.
Step 6: Verify the Building in new Portal
Within the Assessments area, select Select Buildings.
The Building selection window opens.
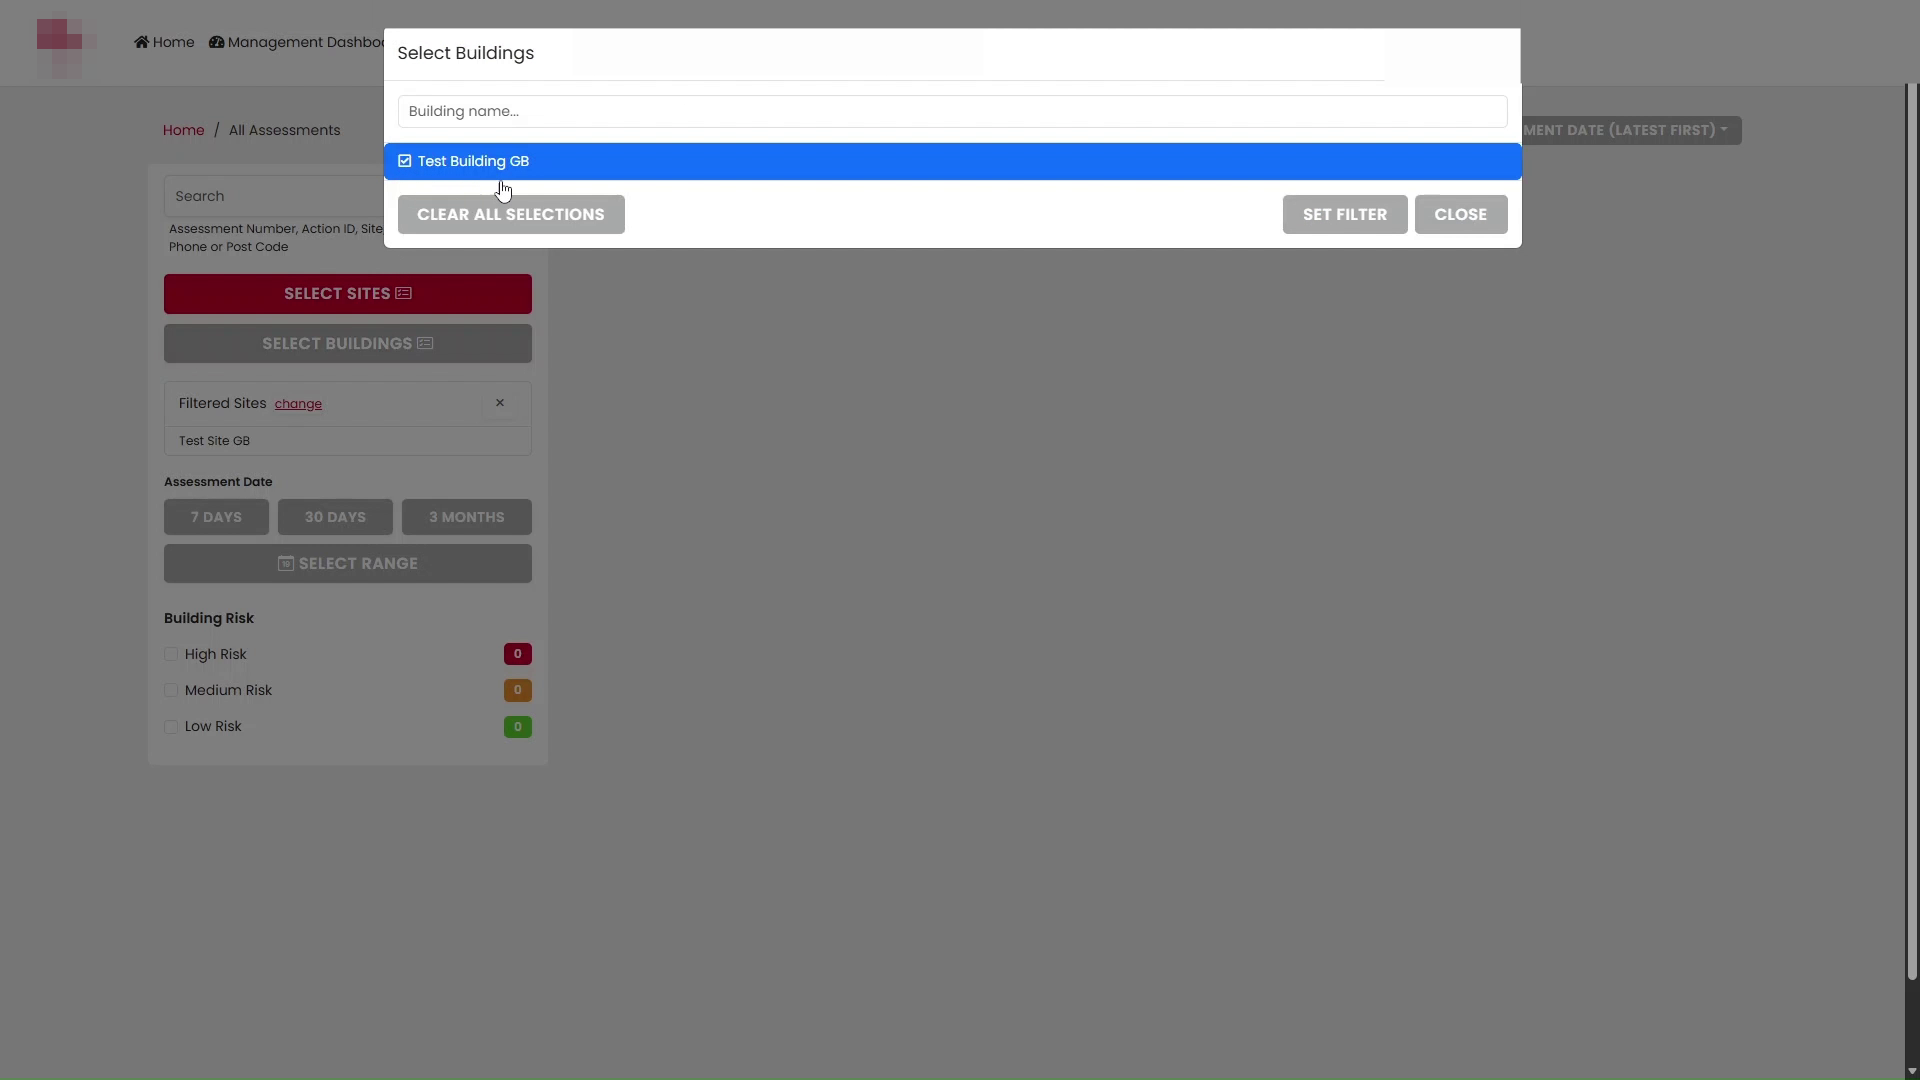
Select the newly created Building.
Select Set Filter to apply the selection.
The Building will now appear within the active Building filters.
This confirms the Building has successfully synced from classic Portal and is available for use within new Portal assessments.
Result
After completing these steps:
✅ The Site has been created in classic Portal
✅ The Building has been created in classic Portal
✅ The Site is visible within new Portal
✅ The Building is available for assessment selection within new Portal
You can now create Fire Risk Assessments against the newly created Site and Building.
Was this article helpful?
That’s Great!
Thank you for your feedback
Sorry! We couldn't be helpful
Thank you for your feedback
Feedback sent
We appreciate your effort and will try to fix the article